
Is your home in rough shape, and you aren’t sure exactly what you can do to improve it? You may need help from professionals who can help manage this step for your needs. But if you don’t feel comfortable calling these professionals or have some financial limitations, you may need to take this process into your hands. Doing so can ensure that your home is solid and secure for years to come.
In this simple DIY home repairs guide, you’ll learn seven different ways that you can improve your home and make it a better place to live. Each of these processes will be described in reasonable depth to make them easier for you to understand. So if you’re looking to do things like garage door spring repairs this year, make sure you read this list to understand your options for your home repair needs.
1. Repairing Garage Doors and Springs

If your garage door springs end up damaged and need to be replaced at any time, you may need help from a professional who can handle these repairs for you. However, there are a few fixes for garage door springs that most homeowners should be able to handle. They do require a careful approach that minimizes the risk of severe damage, though.
You’ll need a variety of tools for this project, including an adjustable wrench, various clamps, a hammer, locking pliers, socket and ratchet sets, and much more. Read through the steps below to check for any more tools that you may need, as these will vary based on your project and the required steps. However, the basic process included here has steps including how you should:
- Lockdown the door using a pair of locking pliers on the track just before the rollers
- Carefully use a winding bar in the winding cone to loosen the broken spring
- Unwind the broken spring very carefully and disconnect it from the bracket
- Carefully secure the torsion tube using the locking pliers on the door
- Remove the old spring and carefully slide the torsion tube to avoid damage
- Carefully insert the new spring and balance it properly
You must be very careful with this process to ensure that it goes as smoothly as possible. The springs in your garage doors are wound very tightly and can be dangerous if you let them get out of control. Therefore, it is crucial to take the time to work on this project very slowly, follow these instructions and read through your garage door manual to minimize this risk for yourself and others.
2. Plumbing Repairs
When you suffer from clogged drains and other types of plumbing issues, you may feel compelled to call a plumbing professional. This step is often a good one if you’re uncertain of what repairs you can handle. However, this DIY home repairs guide focuses on things you can do to help cut back on your plumbing needs and minimize your costs. This process includes these simple steps:
- Trace your pipes through your home to identify where clogs or leaks may occur
- Shut off your water at the source to limit the risk of getting flooded or causing water damage
- Carefully remove the pipes using various types of pipe wrenches and appropriate tools
- Measure the size of the pipe that you need to fully replace the missing option
- Purchase or cut an appropriate pipe to fit in the area that you are replacing
- Place it between the proper pipes and using fittings to hold them up
If your pipes continue to clog after you take these steps, or you experience any other leaks that may cause troubles with your home, it may be time to contact drain cleaning services to learn more. These experts can provide you with the high-quality help needed to ensure that your water flows properly through your home. This benefit is significant for homeowners who want a better house.
3. Repair Wood Damage in Your Home

Another essential step in your DIY home repairs guide is to fix any wooden damage that you might find throughout your house. These structural problems can vary depending on many factors and are typically relatively easy to diagnose and repair. However, if you let them worsen and decay beyond their initial damage point, you’re only putting your home at a higher risk of a severe issue.
Thankfully, most wood repair issues will require only a handful of different steps to ensure that everything goes as smoothly as possible for your needs. You will need to make sure that you pay attention to elements like the design of your home, the type of wood used throughout its construction, and much more. Follow these steps, and you should have little difficulty getting your wood in shape:
- Find any damage to your roof trusses and repair them with the proper wood repair kits
- Inspect any decks on your home and repair their wooden boards and support areas
- Note any problems with the wooden support beams for your foundation and properly fix them
- Pull out damaged wooden walls and replace them with more robust and more secure options
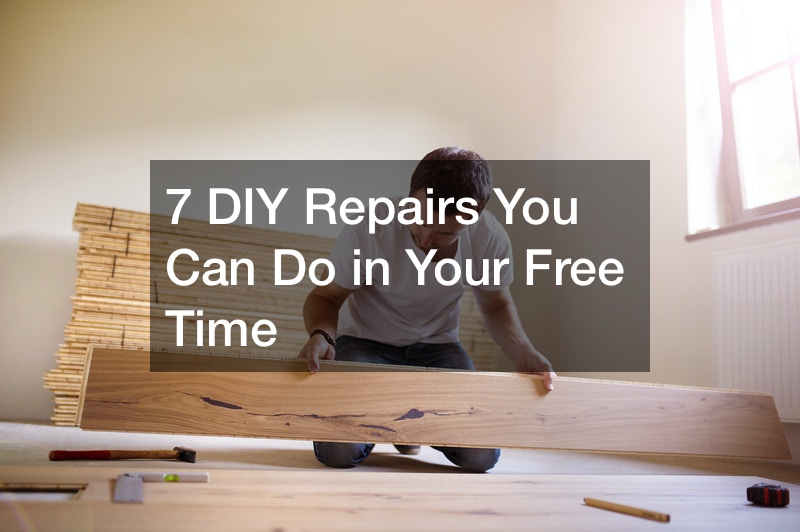
- Replace wooden floors with better and stronger materials to avoid degradation
If you have any damaged materials that need to be removed from your home (such as pieces of drywall or wooden foundation elements), make sure to call local junk removal experts to help. These professionals will work with you to eliminate all of these items and provide you with the help you need to keep your lawn free of debris and other issues as possible for your needs as a homeowner.
4. Repairing Your Garbage Disposal
Garbage disposal is an essential part of most homes and helps prevent food waste issues in your pipes and throughout your sink. Thankfully, replacing your disposal is pretty easy to do if it ends up failing you and you need to replace it. You’ll need a handful of tools, like pipe wrenches and connecting elements designed for the unit. Put in your new garbage disposal by following these steps:
- Open up the bottom of your sink to get your disposal properly
- Disconnect the power source to avoid any shocks or complications
- Identify where it is connected to your sink and carefully remove these connections
- Pull the garbage disposal out of the pipes and place it to the side
- Put the replacement option up between the pipes and position it properly
- Connect the disposal using various bolts and washers to keep it in place
- Plugin the unit and test it by switching on your water and the power switch
- Check for any leaks or other issues and attend to them as they develop
If you’re thinking about this process, you should be able to replace your whole disposal in no more than 20-30 minutes. First, make sure that you check your unit for the wastewater disposal pipe. Some units need you to knock out this section with a screwdriver and hammer, allowing your unit to get rid of water properly. Often, this process is necessary if you have a dishwasher connected to your plumbing.
5. Repair Your Lawn Properly

Though you might not immediately think of your lawn when considering your DIY home repairs guide, your lawn is an integral part of the health and well-being of your home. A bad lawn can cause problems like pest invasions that need pest control help to manage. Bad lawns can also make your home less attractive and trigger many issues. Common issues that you can repair include:
- Broken bits of sod or grass that need to be repaired properly
- Problems with your landscaping that require some adjustments
- Valleys that may pool water and let mosquitoes invade your lawn
- Issues with water management near your house’s foundation
- Damage to various decorative items spread through your lawn
- Common seating area issues that may require you to install new equipment
- Garden concerns that may be hard to adequately address without proper attention
Before starting this process, you need to make sure that you have various equipment, like hoes, rakes, and other gardening devices. You may also need a wheelbarrow and other similar hauling equipment. Some jobs may even require work truck rental to handle this process for your, as you can move various bits of equipment and sod throughout your yard with minimal difficulty and maximum benefits.
6. Repairing a Ceiling Stain Issue
It can be frustrating to see water stains develop throughout your ceiling at multiple spots without warning as a homeowner. As a result, homeowners need to tweak their DIY home repairs guide to include various ways to fix these problems. It is usually best to take the time to read through multiple guides and to purchase different care methods to manage this issue.
This step is vital for your DIY home repairs guide because it helps manage these stains before they worsen and minimize the damage they may cause. As a result, homeowners like you must take the time to address this issue adequately. Thankfully, it shouldn’t take a lot of complex steps for you to learn how to make your roof a more robust and more secure area:
- Lay a cloth on the floor throughout your room where the stain occurs
- Place plastic tapes around the edges of the wall to avoid staining other areas
- Purchase replacement products, like Upshot, that helps to remove stains
- Carefully spray your repair item on the stain to cover it and remove it
- Let the product dry for a few hours before applying another coat, if necessary
When you take these simple steps, you can get rid of water stains and make your home feel more comfortable and relaxing. You can also prevent worsening water stains and keep damage from spreading throughout your ceiling. This benefit is critical because it helps prevent you from replacing stained tiles, which can be a somewhat costly procedure if it isn’t handled with the appropriate care.
7. Weatherstripping Your Doors

Last on our DIY home repairs guide, you can easily weatherstrip your doors to ensure that your temperature control is as accurate and beneficial as possible for your needs. First, you’ll need to make sure that you buy the best weatherstripping for your home’s doors and their frames, paying attention to the colors and much more. This process includes just a few straightforward steps:
- Measure how much weatherstripping you’ll need by gauging the width and length of your doors
- Cut off the proper amount of weatherstripping material and carefully apply it around your frame
- Push the stripping down into place very carefully, working out any air bubbles that may occur
- If necessary, use heat or other tools to carefully seal the area around the door to keep it protected
By following your DIY home repairs guide for this process, you should have little difficulty getting your doors weather-stripped and adequately protected. You may also want to weatherstrip your windows or perform other similar repairs to keep them strong. This step may include adding caulk to your windows or even your door to seal up additional areas that may be important for your home’s structure.
Take Your Time With These Steps
If you follow this simple DIY home repairs guide for your house, you should be able to finish up with your upgrades and renovations reasonably quickly. However, please don’t take this information to mean that you should rush through each of these jobs. Rushing is never a good idea because it’s more likely to cause you to make mistakes or even hurt yourself or others with shoddy repairs that fail on you after finishing.
As a result, you may end up needing a personal injury lawyer to help manage your case. Instead of getting in this situation and experiencing struggles with your home, it is best just to take your time, follow the steps outlined below, and give yourself the time you need to finish. If all else fails, you may need to contact an expert who can provide you with some upgrades and maintenance help.

