

Every homeowner knows that a roof protects everything beneath it, yet few people make time to examine that critical structure until water drips onto the living room floor. By then, the damage extends well past shingles and underlayment, creeping into insulation, drywall, and even electrical wiring. Repair costs multiply quickly because roof problems rarely stay isolated. Instead of waiting for a crisis, you can use a practical roofing checklist to spot developing issues while they are still inexpensive to address.
A proactive approach does more than save money. Routine evaluations build a clear maintenance record that helps document storm claims, verify workmanship warranties, and reassure potential buyers that your home has been carefully maintained. The roofing guide you are about to read distills professional best practices into step-by-step tasks anyone can follow with minimal tools and modest ladder skills. It also highlights when climbing onto the roof becomes risky enough to justify calling a professional.
Each section below covers a part of the roof system—from attic rafters to gutter downspouts—and every section includes two detailed paragraphs so you know exactly what to do and what warning signs mean. By working through this sequence twice a year, you will understand the current condition of your roofing system, catch small issues before they escalate, and decide confidently when to bring in expert help.
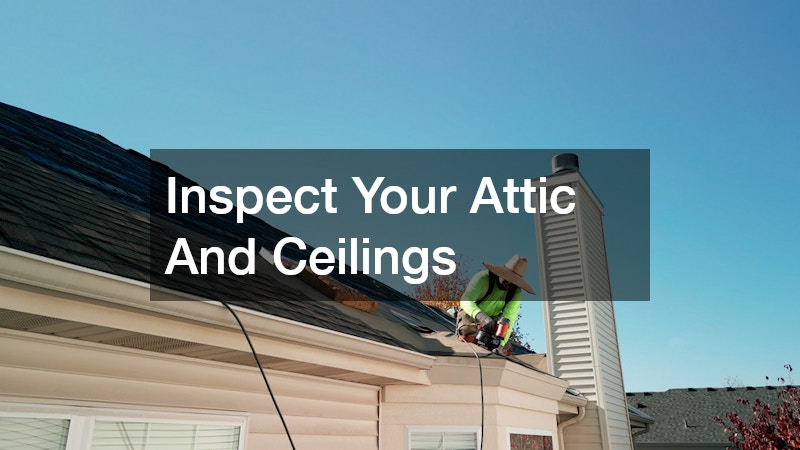
Inspect Your Attic And Ceilings
Start inside because the safest place to uncover leaks is often below the roof deck. Enter the attic on a sunny day and switch off the flashlight for a moment. Pinpoints of daylight near nails or along ridge vents reveal openings where rain and insects enter. Next, run the flashlight slowly across rafters and sheathing, watching for dark stains or puckered wood that signal past moisture intrusion. Pay special attention around plumbing vents and chimneys; any discoloration here can indicate failed flashing above. If you smell a musty odor or see compressed insulation, call a roofer or, better yet, a residential roofer who specializes in moisture remediation before mold becomes a health issue.
After examining the framing, look down at the attic floor. Insulation should feel light and fluffy, never matted or crusty. Streaks of white mineral deposits often accompany slow leaks that evaporate before dripping through the ceiling. Mark those spots so you can check them during the next rainfall. Log everything you saw in your personal roofing checklist, noting the date and current weather. Over time, patterns will emerge that point to the true source of a stubborn leak rather than the spot where water finally shows up inside the home.
Examine Shingles And Roofing Material
Once the interior scan is complete, move outdoors on a clear, calm morning. Walk the perimeter of the house looking for shingles that curl, buckle, or have missing granules. Differentiate between normal weathering—slight color variation is inevitable—and damage that exposes felt or bare plywood. While asphalt remains the dominant residential covering, many homes now feature standing-seam metal. If your property has a metal system, inspect panel seams to ensure fasteners remain tight and that factory coatings show no sign of chalking. When deterioration appears, a qualified metal roofer can often refinish panels long before full replacement is necessary.
Next, set up a ladder and climb just high enough to see ridge and valley lines. Flash the light across the surface to highlight depressions; these indicate sagging decking beneath the shingles. Document every irregularity on your roofing checklist, including the approximate location expressed by gutter spikes or vent pipes. Writing precise notes becomes invaluable if you later compare repair bids because contractors will see exactly what caught your attention and where.

Check Flashing Seams and Penetrations
Flashing is thin metal that bridges joints where roofing meets vertical elements, and it is the most common avenue for water to reach the interior. From ground level, use binoculars to assess chimney counter-flashing, step-flashing along dormers, and rubber boots surrounding plumbing vents. Rust, bent edges, or missing sealant warrant closer inspection. If you are comfortable on the roof, gently lift shingles near suspect flashing to verify that no nails have popped up and that adhesive membranes remain intact. Should you find gaps wider than a quarter inch or sealant that flakes under light pressure, begin soliciting quotes from roofing contractors right away because deterioration accelerates rapidly once exposed.
Remember to address satellite dish mounts, skylight curbs, and solar stanchions. These penetrations often fall outside core roofing warranties, and manufacturers may require specific aftermarket flashing kits to maintain coverage. Add each penetration type to your roofing checklist so you do not overlook them during future inspections. When replacement feels out of scope for DIY work, a licensed professional can remove old flashing, apply high-temperature underlayment, and reinstall updated components with factory-approved fasteners.
Evaluate Gutters Downspouts and Drainage
Proper drainage keeps even a perfect roof from failing prematurely, which is why clogged gutters can cause more harm than missing shingles. From a sturdy ladder, scoop leaves and sediment into a bucket rather than flushing everything down the downspout, which could jam underground drains. Check spike hangers or hidden brackets every three feet; sagging sections trap water that seeps beneath drip edge flashing. Overflow marks—dark vertical streaks known as tiger stripes—prove that water previously escaped. After cleaning, run a garden hose in the farthest corner and watch the flow exit the downspout elbow. If water backs up or trickles, call local roofing companies that offer complete gutter tune-ups, including slope adjustment and new hangers.
While you work, inspect fascia boards for rot and paint blisters that indicate moisture retention. A deteriorating fascia compromises not only gutter attachment but also ventilation because soffit intakes rely on tight joints for proper airflow. Log the gutter condition in your roofing checklist alongside any fascia notes, then photograph each trouble spot with a phone for easy reference if you later file a warranty claim.

Review Roof Decking and Structural Supports
Decking sits between shingles and rafters, serving as the last dry barrier before water infiltrates living space. From inside the attic, push firmly—but carefully—against the plywood or OSB between trusses. Soft spots or flexing warrant immediate attention because they show that long-term moisture has already begun breaking down structural bonds. Outside, uneven roof planes hint at warped decking. Use a six-foot level to detect dips; an inexpensive laser level also works if you project a line across ridge and valley. When replacing decking sections, consider bundle scheduling with siding installs if you need to repair gable walls at the same time. Coordinating both projects can reduce scaffold rental and labor duplication.
Write detailed measurements—length, width, and apparent depth—of every dip or rise into your roofing checklist. Include photos with a measuring tape in the frame for scale. These details help verify that a repair crew swapped compromised panels rather than merely adding new felt and shingle layers over weak wood, which would guarantee the problem resurfaces.
Look For Storm Specific Damage
Hail, high winds, and wind-driven debris often leave subtle yet serious wounds. After any extreme weather event, scan the yard for shingle fragments, metal flashing shards, or displaced ridge caps. Hail bruises seldom puncture shingles right away but crush underlying mat layers, shortening lifespan significantly. Windward roof edges typically lose entire rows because suction forces peel them upward. Reach out quickly for emergency roof repairs if you see exposed nails, torn underlayment, or daylight through the decking while inside the attic.
Even if the roof appears intact, inspect again during the first heavy rain that follows the storm. Water infiltration often shows up as tiny drips around electrical fixtures or as darkened drywall seams. Recording what you observe immediately on your roofing checklist provides time-stamped evidence for insurance adjusters who may argue that damage is old or unrelated to the storm. Swift action also allows reputable contractors to apply temporary tarping that prevents additional saturation.

Measure Ventilation and Energy Performance
Balanced ventilation keeps attics within fifteen degrees of outdoor temperatures, limiting ice dam formation in winter and slowing asphalt degradation under summer heat. Begin by counting intake and exhaust vents, ensuring you have roughly one square foot of net free area for every 300 square feet of attic floor when a vapor barrier is present. Ridge vents should be continuous without obstruction from nails or insulation baffles. Gable vents help cross-flow but can disrupt ridge performance if both remain open. Inadequate balance manifests as rusted nail heads, mold on sheathing, and excessive utility bills. Should you identify deficiencies, schedule a roof repair service that includes baffle installation and soffit cleaning.
Thermal imaging cameras—often available at tool-rental counters—highlight hot spots and cold bridges that waste energy. Capture images during early evening when temperature contrasts peak. Insert each annotated image into your checklist so future upgrades can target the worst offenders first. Remember, ventilation improvements often qualify for local energy rebates, offsetting part of the cost.
Consider Adjacent Exterior Systems
A roof rarely fails alone. Brick chimneys crumble, skylight lenses craze, and solar mounting bolts loosen over time. Check mortar joints with a screwdriver; crumbling indicates urgent tuck-pointing. Skylights require gasket inspections and cleaning around weep holes to prevent interior condensation. Solar arrays must maintain proper standoff height to allow drainage and airflow. Where dormers meet the main roof, siding laps should step according to manufacturer guidelines, and caulk joints deserve annual renewal. Complex intersections are best handled by residential roofing companies that field crews skilled in carpentry, flashing, and trim painting.
If you see any doubt about the integrity of these transition zones, write the concern clearly in your roofing checklist and consult a local residential roofing contractor who can coordinate multiple trades. Consolidated oversight reduces miscommunication, shortens project timelines, and builds a single warranty instead of piecemeal coverage that leaves gaps when damage occurs.
Compare Professional Repair Options
When inspections reveal more work than a homeowner should tackle, gather three bids from reputable professionals. Ask each company to walk the roof with you, referring to every point on your roofing checklist so they understand what you flagged. Evaluate more than price—look for state licensing, general liability insurance, and manufacturer certifications that qualify crews to install high-performance membranes or specialty shingles. Some firms focus solely on replacements, while others prefer repairs. A contractor willing to patch correctly can extend roof life several years, allowing you to budget for future upgrades.
Be sure to ask whether the firm employs its own staff or relies entirely on subcontractors. Direct employees are easier to schedule for follow-up visits should minor workmanship issues arise after the main job ends. Also request warranty details in writing: many products feature fifty-year limited warranties, but workmanship coverage often lapses after ten years unless you schedule annual maintenance. Factor such stipulations into the final decision.
Plan Seasonal Maintenance and Documentation
Even a brand-new roof benefits from continued surveillance. Schedule spring and autumn walkthroughs to repeat each step of the roofing checklist, adding new photos and updating notes about any changes. Consistent documentation protects you from manufacturer or insurance denial based on alleged neglect. Keep digital copies in a cloud drive labeled by date for convenient retrieval. If severe weather approaches, move patio furniture away from eaves and cut dead limbs that could strike shingles. After storms pass, revisit your notes and compare fresh images with prior ones to spot new issues quickly.
Smart homeowners also track product batch numbers and installation dates for shingles, underlayment, and flashings. Should a recall occur, you will know exactly which sections qualify for replacement. Your meticulous record may even lower premiums with insurers that reward proactive maintenance.
A roof inspection does not require a professional’s eye to catch every problem, but it does demand a disciplined approach that covers the same ground every time. By following a structured roofing checklist you create a repeatable routine that transforms random glimpses into a reliable diagnostic program. Whether you discover curled shingles, clogged gutters, or flashing gaps around a skylight, each item gets documented, prioritized, and resolved before it undermines the building envelope.
Think of the checklist as preventive medicine for your home. Completed twice a year—and after any major storm—it arms you with the knowledge to choose between do-it-yourself fixes and expert intervention. More importantly, it positions you to speak confidently with contractors, insurers, and even future buyers because you possess a clear, detailed history of the roof’s condition. In the end, that diligence translates into lower repair costs, longer material life, and the peace of mind that comes from knowing the house can weather whatever the seasons deliver.