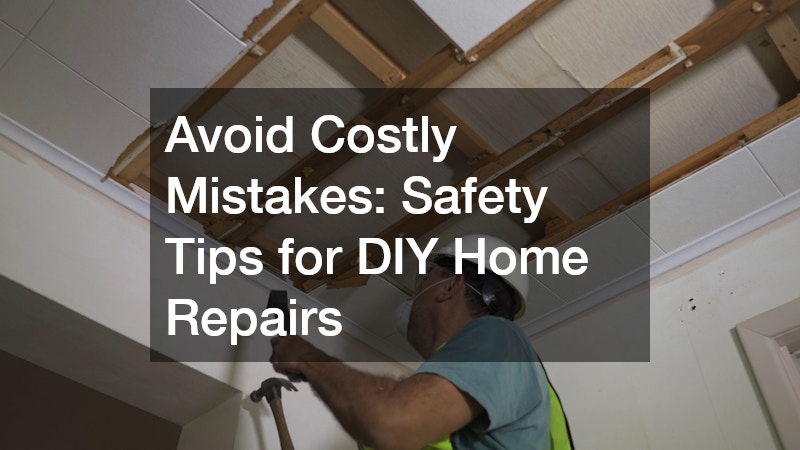

Home improvement projects can be deeply rewarding. Whether it’s fixing a leaky faucet, painting a room, or repairing damaged drywall, doing it yourself (DIY) saves money and gives you a sense of accomplishment. However, DIY projects can also pose significant risks if not approached safely. Every year, thousands of homeowners are injured due to falls, electrical shocks, chemical exposure, or misuse of tools during home repairs. These accidents are often preventable with proper preparation, equipment, and awareness.
The goal of DIY home repair is not just to save money—it’s to maintain and improve your home efficiently and safely. Understanding safety fundamentals is crucial, especially when dealing with tasks involving electricity, ladders, or heavy materials. Even simple repairs can become hazardous without the right precautions.
This guide explores essential safety tips to help homeowners complete their projects confidently while minimizing risk. We’ll cover everything from choosing the right tools to identifying hazards, using personal protective equipment (PPE), and knowing when to call in professionals such as garage door repair or hardscaping services experts.
By the end of this article, you’ll understand how to approach your next home project with a balance of skill, caution, and confidence—avoiding costly mistakes and ensuring your safety every step of the way.
1. What Are the Essential Tools for DIY Home Repairs?

Every DIY project starts with the right tools. Using quality equipment not only makes the job easier but also significantly reduces the risk of accidents. Before starting any repair, take time to inspect, clean, and organize your tools.
For basic home repairs, you should have:
- A hammer, screwdrivers (flathead and Phillips), and pliers
- A tape measure, level, and utility knife
- A cordless drill and set of drill bits
- A stud finder for wall mounting
- A flashlight or work light for low-visibility areas
- Safety items such as gloves, goggles, and dust masks
If you’re tackling a more complex job—like garage door repair—specialized tools are necessary. Garage door springs, for instance, are under high tension and can cause serious injury if handled incorrectly. Having proper tension rods, clamps, and sturdy ladders ensures safety and precision.
Always read manufacturer manuals and check for wear and tear on your tools. Dull blades, frayed cords, and loose handles can cause accidents. Investing in high-quality tools may cost more upfront, but it reduces the risk of equipment failure—and protects you from serious harm.
2. How Can I Identify Potential Hazards Before Starting a Project?
Before picking up a hammer or turning a screw, it’s important to evaluate your workspace. Identifying hazards early prevents injuries and helps you plan effectively.
Start by assessing the work area’s condition. Clear clutter, remove tripping hazards, and ensure the floor is dry and well-lit. If you’re doing gutter repair, for example, check for overhead power lines and unstable ladder surfaces before starting. Wet or uneven ground can cause ladder slips or falls.
Check for hidden dangers behind walls, ceilings, or floors. Use a stud finder and wire detector to locate electrical wiring, pipes, and studs before cutting or drilling. Accidentally hitting a live wire or pipe can be dangerous and expensive to fix.
If your project involves dust, fumes, or chemicals, improve ventilation by opening windows or using exhaust fans. Finally, review local building codes to ensure your repair complies with safety regulations.
By identifying and mitigating potential risks before beginning, you’ll create a safer, more efficient work environment—and reduce the likelihood of unexpected emergencies.
3. What Personal Protective Equipment Should I Use?
Personal Protective Equipment (PPE) is essential for every DIYer, no matter how small the project. PPE minimizes exposure to physical and environmental hazards that could cause injury.
At a minimum, you should always have:
- Safety goggles to protect eyes from debris, dust, or splinters
- Work gloves to guard against cuts, burns, and abrasions
- Ear protection (earplugs or earmuffs) when using loud tools
- Dust masks or respirators for sanding, painting, or cutting materials that release fine particles
- Steel-toed boots for protection against dropped tools or heavy materials
If you’re working on roof repairs, PPE becomes even more critical. In addition to standard gear, wear a safety harness, non-slip shoes, and ensure your ladder is stable and properly secured. Avoid working in wet or windy conditions, and always have someone nearby in case of emergency.
Remember: safety gear isn’t an option—it’s a necessity. The right equipment can prevent lifelong injuries and make every project safer from start to finish.
4. How Do I Ensure Electrical Safety During Repairs?

Electrical repairs are among the most dangerous DIY projects. Even a small mistake can lead to shocks, fires, or worse. The key to electrical safety is preparation, caution, and knowing your limits.
Before starting, turn off power at the circuit breaker and test outlets or wires with a voltage tester. Never rely solely on wall switches to cut power—they may not control all connected wires.
If you’re working with outlets, switches, or light fixtures, use insulated tools and wear rubber-soled shoes. Keep your work area dry and avoid overloading circuits with too many devices.
For more complex electrical work—like wiring HVAC systems or connecting thermostats—contact a licensed AC company. They have the tools and expertise to ensure your wiring meets code and operates safely. Attempting advanced electrical work without training can result in costly damage or injury.
When in doubt, always prioritize safety over savings. Professional electricians exist for a reason: they protect both your home and your life.
5. What Are the Best Practices for Ladder Safety?
Ladders are essential tools for tasks like cleaning gutters, painting, or repairing roofs—but they’re also one of the leading causes of home repair injuries. Following ladder safety guidelines can prevent serious falls.
Before using a ladder, inspect it carefully for cracks, missing rungs, or unstable hinges. Set it on a flat, solid surface and ensure it’s fully extended and locked. The ladder should be placed at a 75-degree angle—about one foot away from the wall for every four feet of height.
If you’re cleaning gutters or performing air duct repairs, maintain three points of contact (two hands and one foot, or vice versa) at all times. Never lean too far to one side or stand on the top rung. If something is out of reach, climb down and reposition the ladder.
Avoid using metal ladders near electrical wiring, and never use a ladder in high winds or on slippery surfaces. When working at height, consider using stabilizers or having a second person hold the base. These small precautions can prevent severe falls and injuries.
6. How Can I Protect Myself from Chemical Exposure?
Many home repair products—paints, adhesives, solvents, and cleaners—contain chemicals that can be harmful if inhaled or absorbed through the skin. Understanding how to handle these materials safely is crucial.
First, read all product labels and follow the manufacturer’s safety instructions. Use materials in well-ventilated areas, ideally outdoors or in rooms with open windows and fans. When working on projects involving HVAC repairs, for example, cleaning ducts or coils may expose you to mold, dust, or harsh cleaning agents—so always wear a mask or respirator.
Store chemicals properly in their original containers and away from heat sources or direct sunlight. Never mix products unless explicitly stated safe, as chemical reactions can release toxic fumes.
Personal protective gear like gloves, goggles, and respirators helps reduce risk. Keep a first-aid kit nearby, and in case of accidental exposure, rinse affected areas immediately and seek medical attention if necessary.
By handling chemicals responsibly, you protect both your health and your home environment.
7. What Steps Should I Take to Prevent Falls?
Falls are among the most common causes of home repair injuries, but they’re also the most preventable. Taking simple precautions can help you stay safe during any project involving height or uneven surfaces.
Start by keeping your workspace clean and clutter-free. Remove cords, tools, and debris from walkways to prevent tripping. When doing interior door installation or repairing ceilings, ensure your ladder or scaffolding is on a stable surface.
Wear non-slip shoes and avoid working in socks or slippers. If you’re working outdoors, check for wet or icy surfaces before climbing ladders or scaffolding. Use proper lighting to clearly see your work area, especially when working in basements or attics.
For projects involving roofs or elevated decks, use safety harnesses and guardrails whenever possible. If you start feeling dizzy or fatigued, take a break—fatigue increases the risk of losing balance.
These small habits dramatically reduce your risk of falls and help you complete projects safely and confidently.
8. How Do I Safely Handle Heavy Materials?
Lifting and moving heavy objects improperly can lead to serious back injuries or muscle strain. Learning proper lifting techniques is vital for safe DIY work.
Before lifting, plan your movements. Clear your path and ensure you have a safe place to set the item down. Bend your knees—not your back—and use your legs to lift. Keep the object close to your body, and avoid twisting while carrying it.
For large or awkward items, such as furniture, doors, or appliances, use lifting straps or dollies. If you’re moving heating oil tanks or fuel containers, contact a local oil delivery service for assistance. They have specialized equipment for handling heavy or hazardous materials safely.
When working with multiple heavy components—like concrete pavers or landscaping stones—pace yourself and ask for help when needed. Fatigue increases the risk of injury.
Always respect your limits. Knowing when to use mechanical aids or seek help is a key part of DIY safety and long-term physical health.
9. What Should I Do in Case of an Accident?
Even with careful preparation, accidents can still happen. Having a plan in place can make all the difference in minimizing harm.
First, keep a fully stocked first-aid kit accessible at all times. Include bandages, antiseptic wipes, adhesive tape, burn cream, and emergency contact numbers. If an injury involves bleeding, apply pressure with a clean cloth and seek medical attention if the wound is deep.
For electrical shocks, turn off the power before touching the injured person and call emergency services immediately. Burns or chemical exposures should be rinsed with cool water for at least 15 minutes.
It’s also important to keep emergency supplies such as a fire extinguisher, flashlight, and phone nearby during every project. Having water purifiers or bottled water available ensures hydration—especially when working outdoors or in warm conditions.
After any incident, assess what went wrong and adjust your safety practices. Learning from small mistakes prevents larger ones in the future.
10. How Do I Know When to Call a Professional?

One of the smartest safety decisions a homeowner can make is recognizing when a project is beyond their skill level. DIY has limits, and pushing those boundaries can lead to injuries or costly damage.
If your repair involves high-voltage electricity, gas lines, structural changes, or specialized tools, it’s best to call a professional. For example, hardscaping services can safely handle heavy stonework, excavation, and grading that require experience and machinery. Similarly, complex HVAC, plumbing, or roofing projects should always be handled by certified experts.
Professionals not only bring expertise but also insurance coverage, ensuring that if something goes wrong, you’re not financially liable. Hiring experts may seem more expensive upfront, but it often saves money by preventing rework, property damage, or medical costs from accidents.
Ultimately, DIY projects are meant to be empowering—not dangerous. Knowing your limits and calling in help when needed ensures your safety, protects your investment, and leads to better, longer-lasting results.
DIY home repairs can be satisfying, cost-effective, and empowering—but only when done safely. By understanding potential hazards, wearing proper protective gear, and following best practices, homeowners can complete repairs confidently while minimizing risk.
Remember that safety always comes first. From identifying hazards and ensuring electrical safety to using ladders properly and handling chemicals with care, every precaution counts. And when a project feels too complex, calling professionals like garage door repair or hardscaping services experts can prevent costly or dangerous outcomes.
With preparation, patience, and the right mindset, you can achieve beautiful results while keeping yourself and your home safe. DIY isn’t just about doing it yourself—it’s about doing it smartly and safely.